We may earn money or products from the companies mentioned in this post, but this does NOT cost you anything extra! Check out my full disclosure for more info.
Updated: 9/25/2024
This is an updated post on my original 2013 Toyota Rav4 camper build. It was easy, and I know anyone can do these modifications in less than a weekend.
First of all, there are some amazing builds out there, but if you are like me, you don’t know where to start. Add to it that you don’t have many tools, are the best at building things, and think building out your vehicle is a distant dream.
I’m here to tell you that if I can build out my Rav4, you can build out your vehicle too!
My build is simple and reliable. Feel free to use any of my ideas and build upon them. My only request is that you come back and share what you did.
Seeing all the builds out there has been the best part of this process, and I look forward to what you are doing or have done.
Short on time? This post covers some of the following:
- Easy Conversion: The article offers a straightforward guide to convert a Toyota RAV4 into a camper, suitable for beginners.
- DIY Platform: You always have options, such as a PVC platform or built-in (aka my 2.0 build). The key is to create a flat sleeping area with storage underneath.
- Affordable Build: Whatever option you choose, it doesn’t have to break the bank. I’m a big fan of using what you have and building from there.
- Power Solutions: We all need portable power options like battery packs and solar panels.
- Stealth Camping: Tips on maintaining a low profile while camping, including the use of blackout curtains.
You can also jump to a section you are interested in below!
It’s not as expensive as you think
The idea here is that you do not need many tools, and I truly believe anyone can do this in their own vehicle.
Yes, it would be amazing to have a van conversion and be able to stand up. But not everyone has the money or the ability to do this.
After I priced out different vans, I decided to build out my own vehicle, which happens to be a 2013 Toyota Rav4.
I have gone on many camping trips as well as long road trips. So far, this setup has worked great for me.
Join the Wilde Escape community and grab your Free Camping Checklist.
Let’s make your next adventure your easiest one yet.
Use this as a guide
This post is just an overview of everything I’ve done with my Rav4.
Feel free to click on any of the links on this page to be taken to a more in-depth review and ideas.
If you have any questions, please contact me or, better yet, leave a comment.
The following is my 2013 Toyota Rav4 conversion.
Let me know what you think. Leave a comment below!
My Old Setup
For as long as I can remember, I would fold the rear seats, put them in my sleeping bag, and call them a day. This generally provides a flat(ish) surface where you can sleep.
This worked better when I had a truck and would use a tarp to keep the rain off me.
As for the Rav4, well, the rear seats do not fold flat. You cannot see it from this photo, as the area is pretty cluttered, but there isn’t much room to move stuff around.
My goal became to be more comfortable.
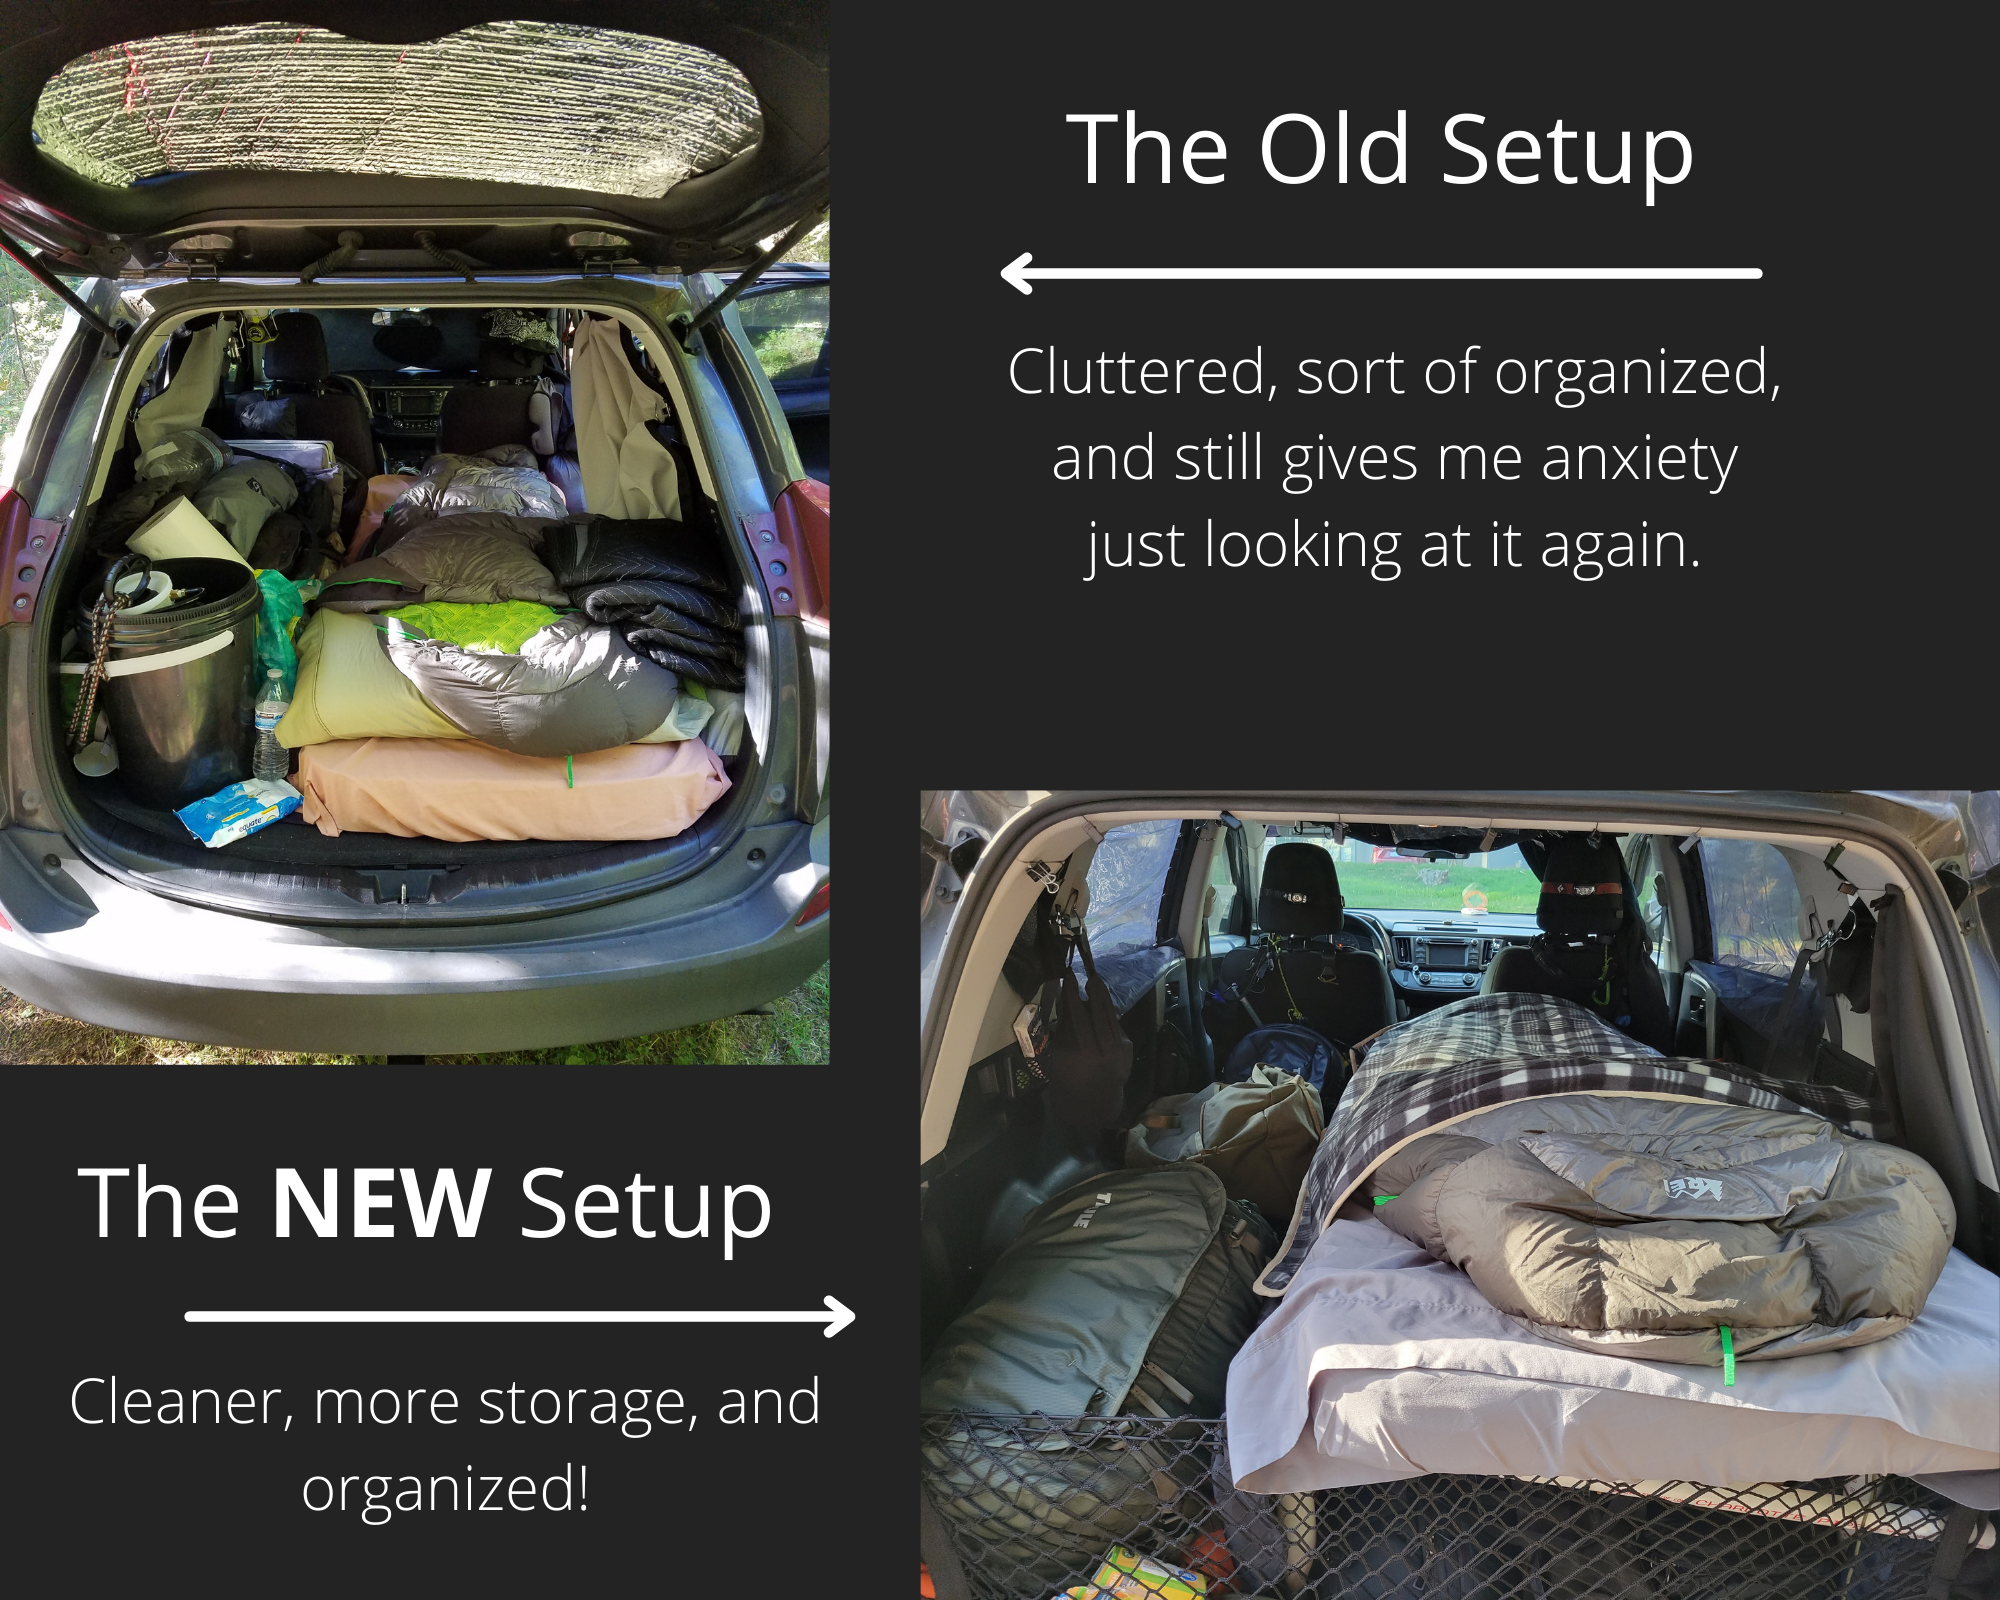
And now, the platform 2.0 has been completed!
My Toyota Rav4 Camper Build
When deciding on converting a vehicle, there are many things that you can do and consider, such as an outside fan, solar, rooftop box, and so on.
My whole idea is that I have a Rav4, not one of those other amazing vans online. So I decided to use what I had.
A few other things I kept in mind are that I did not want to drill anything or permanently mount anything to the vehicle. Due to the possibility of selling it in the future, I want to put it back in a regular vehicle (with the seat in the back and all).
Last, and maybe most important, was keeping stealth in mind. I want to be able to use this vehicle as a daily driver and be able to camp anywhere I happen to be.
Let’s get to the build…finally.
The Exterior of my Rav4 Camper
I have made a few alterations, which is my current setup.
- Thule Aeroblade Edge in black. These are nice because they don’t stick out and look similar to the factory crossbars.
- Thule Canyon basket. If you need or want some extra room, this is for you. I would love to have a box, but I don’t want to jeopardize a lot of gas mileage or deal with setting it up and taking it down. With this basket, I can do it all by myself! A great place where I can put anything needed, I have tie-downs and a net to secure everything. As you may know, I removed my rear seat, so the basket is perfect for my spare tire.
- During my last road trip, I decided I needed to get external lighting on the Rav4. You can easily spend hundreds of dollars on a light setup. I found something that works great and doesn’t break the bank, and I’m so happy with the setup.
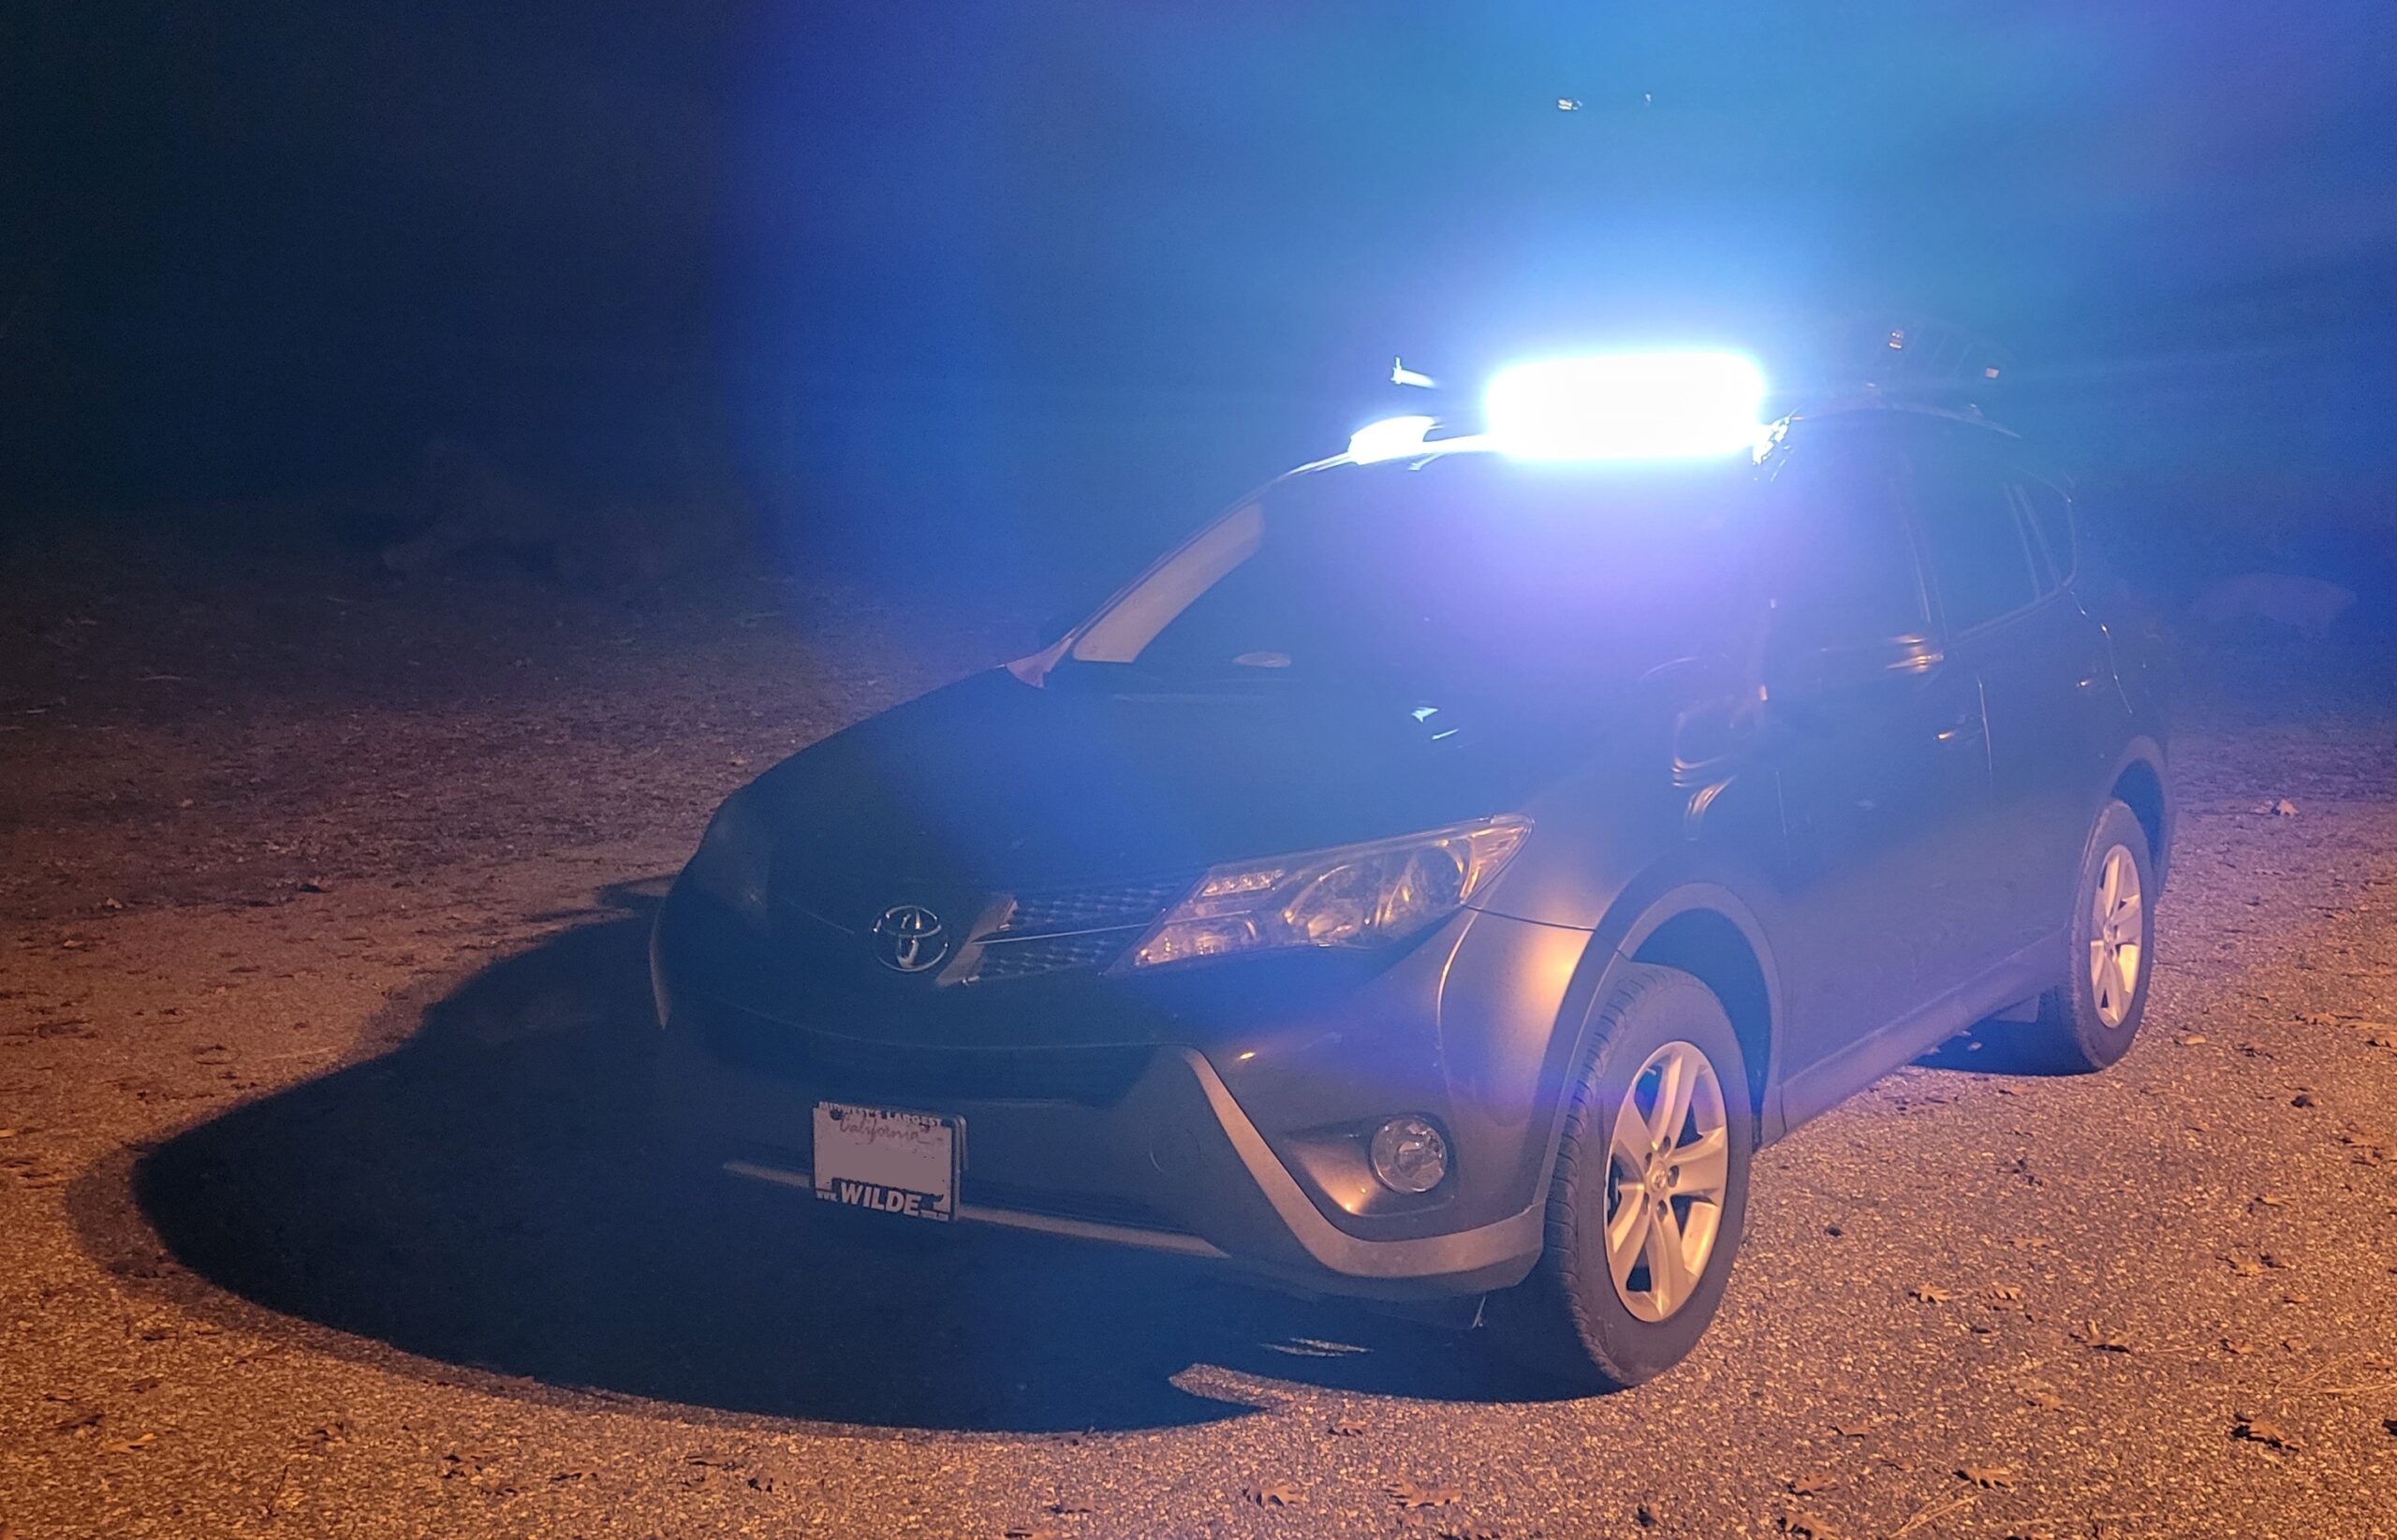
The new lightbar - Motion lights! These are a truly amazing addition to the Rav4 setup. You have to check out my post on why (click here).
- Spare tire lock. Yes, I currently do not have a full-size spare (thank you to everyone who points that out), but it is on the list of things to get. With that said, I don’t want someone stealing it, so a lock that is simple to use, cheap, and a deterrent.
- Curt hitch, specifically made for my vehicle. I purchased it in 2014, and it still holds up perfectly.
- Thule T2. I have a hitch mount T2 rack when I take my bike anywhere. This is a platform rack and is the BEST out there.
- I also have a hitch step called the Bully that I have on when the T2 isn’t. This allows for a good step, seat, and access to the top roof area.
- I also have a hitch safe for hiking and want to keep a spare key or another small item.
- Rain guards for your windows. It took me a while to get these; I am so glad I did. These are amazing and can be used in the rain to crack your windows down and get fresh air in.
- Blindspot side mirror. I always have these on my vehicles and think everyone should have them.
- Hatchback tent, see photo below, which has been something I have wanted for a few years! It’s awesome and will be even better in the summertime (it’s currently winter, and I like my hatch closed to keep in the warm air)
- I also decide to purchase some skinny magnets to help keep the bugs out. I have found there are some small gaps that the tent does not cover on my specific vehicle.
- I also have mosquito netting that I cut to size for my windows. My Rav has metal around the sides, so I use magnets to keep them up. I have been in some bug-infested areas, and this netting has worked great.

The Interior of my Rav4 Camper
As I started writing this section and adding links, I found it was super long.
So I will do my best to break it down into sections.
Also, I tried to make all the links open in another window. That way, if you want to continue reading where you left off, you won’t lose this page (let me know if any of the links don’t work too).
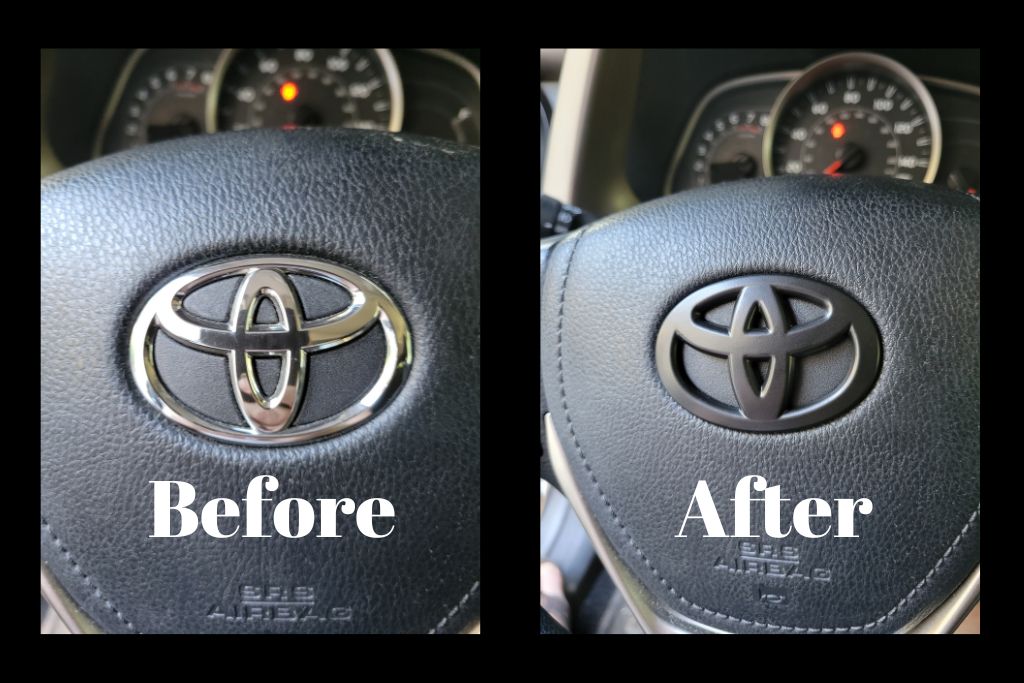
I recently purchased something that I think isn’t needed, but I think it’s amazing! It’s the little decal on the steering wheel (it always blinds me from the sun’s reflection). So I got a decal cover, and it works perfectly!
IMPORTANT EQUIPMENT
- Road and vehicle safety stuff, to include the following:
- First aid kit, this should go without saying. As a side note, have one for your pet too.
- You could also consider a modified survival kit as well.
- I have used this Jumper pack many times, but only on other people’s vehicles. It’s so easy to use and is a nice piece of mind knowing I can always start my own vehicle. I ensure it’s charged every month or two, especially if I’m going on a road trip.
- I also have a backup pair of simple jumper cables too.
- A tire patch kit is not only needed but surprisingly easy to use
- Tire inflator, if you get a flat and are away from civilization, you will be glad to have this. There are better ones out there, but I got this on a good sale. I haven’t used it yet, besides filling up a basketball.
STORAGE TIPS
- Remember one thing: it’s all about vertical space. You always have room to put stuff in a van or a large vehicle. If you are in a car or small SUV, you soon realize your space is limited.
- I have small nets all over my Rav. They help with the smaller things that I tend to misplace and even are perfect for putting keys and my cell phone in when I’m sleeping. That way, I know where everything is. I also noticed that I must use glue to ensure they don’t fall off. My favorite is the Gorilla Glue.
- You will be amazed at what you can find for vehicle storage. I found a tailgate cargo net that has been awesome to have.
- I also have a ceiling storage net that serves many purposes. It can hold bulky items and holds my phone when I want to watch something while lying down.
- Security is important, and I use two safes. One I really like is the Gunvault MicroVault, and the other smaller one is the Gunvault Nanovault.
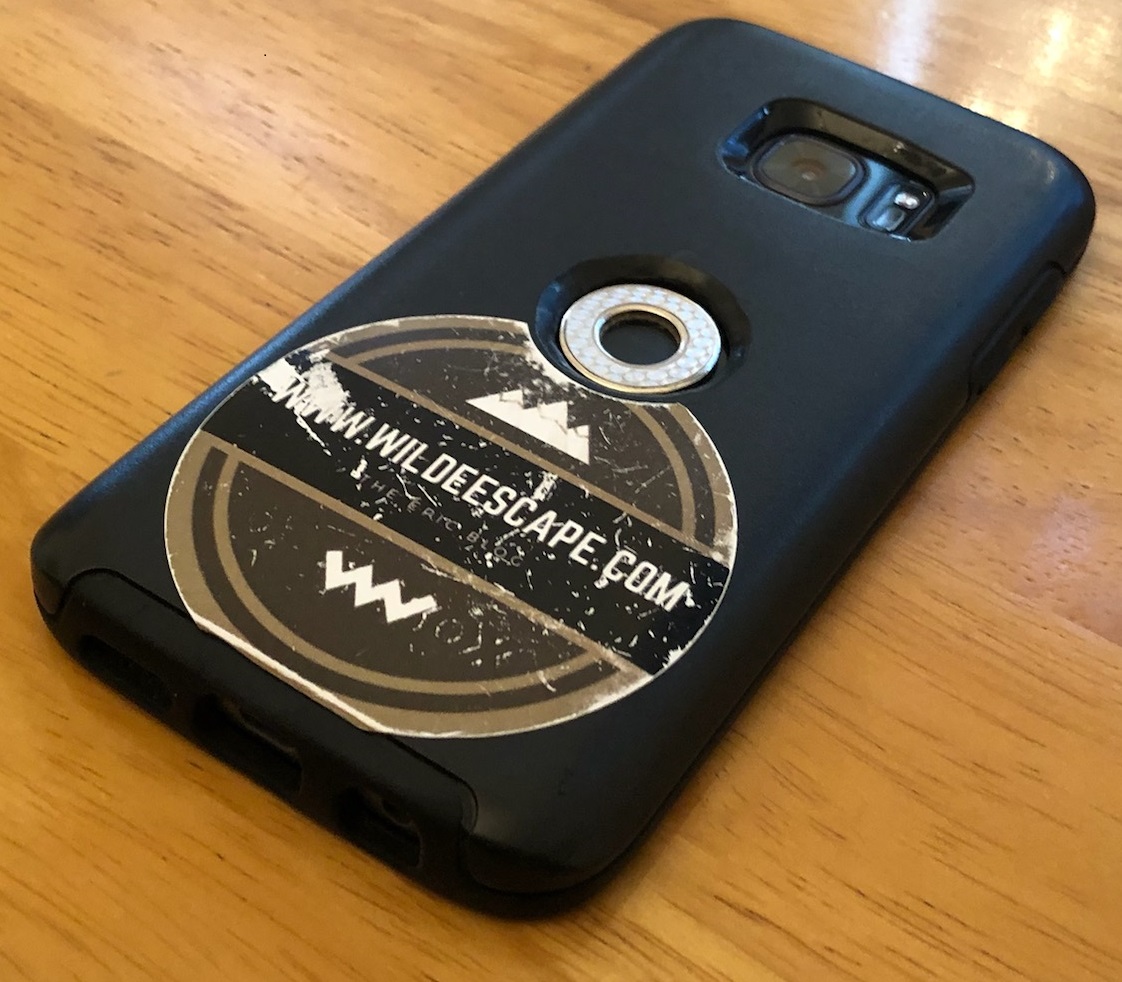
- See the image above on my phone mount, which is really nice to have. I also purchased an Otterbox phone holder and cut a small hole in the back so the phone still lays flat (see image for better detail).
- Many bags for storage
- A reusable small trash bag, I keep this up front, and it’s very convenient.
- Thule bags for miscellaneous items such as clothing
- 5.11 bag for medical supplies (just because I had it lying around)
- My favorite bag is Mountain Ridge Gear. I have all their duffel bags and many others (Cody backpack, map bag, and smaller bags that I have everywhere).
- Side of seat storage, I use one on both the driver and passenger seats.
- Passenger seat storage, which goes on my passenger seat. It’s easy to access and can easily be swung to the back if I ever have a passenger.
- On my passenger visor, I have a small bag for storage.
- I purchased two different types of hangers. This has helped me hang jackets and such and clip them onto part of the Rav for hats. The two types I got were folding hangers and hooks with clips.
- Center console organizer or shelf. Again, it’s all about using that vertical space. Make sure you choose the make and model of your vehicle.
- Headrest hooks for hanging things on the back of your seats. Side note: I recently purchased these and liked them much more.
- I use Small hooks to hold up my curtains and other odd things. Like on the rear hatchback, I also used a few to glue onto my Rav to clip the curtains. As I said, I have tried a few things that have worked the best.
CURRENT SLEEPING SETUP
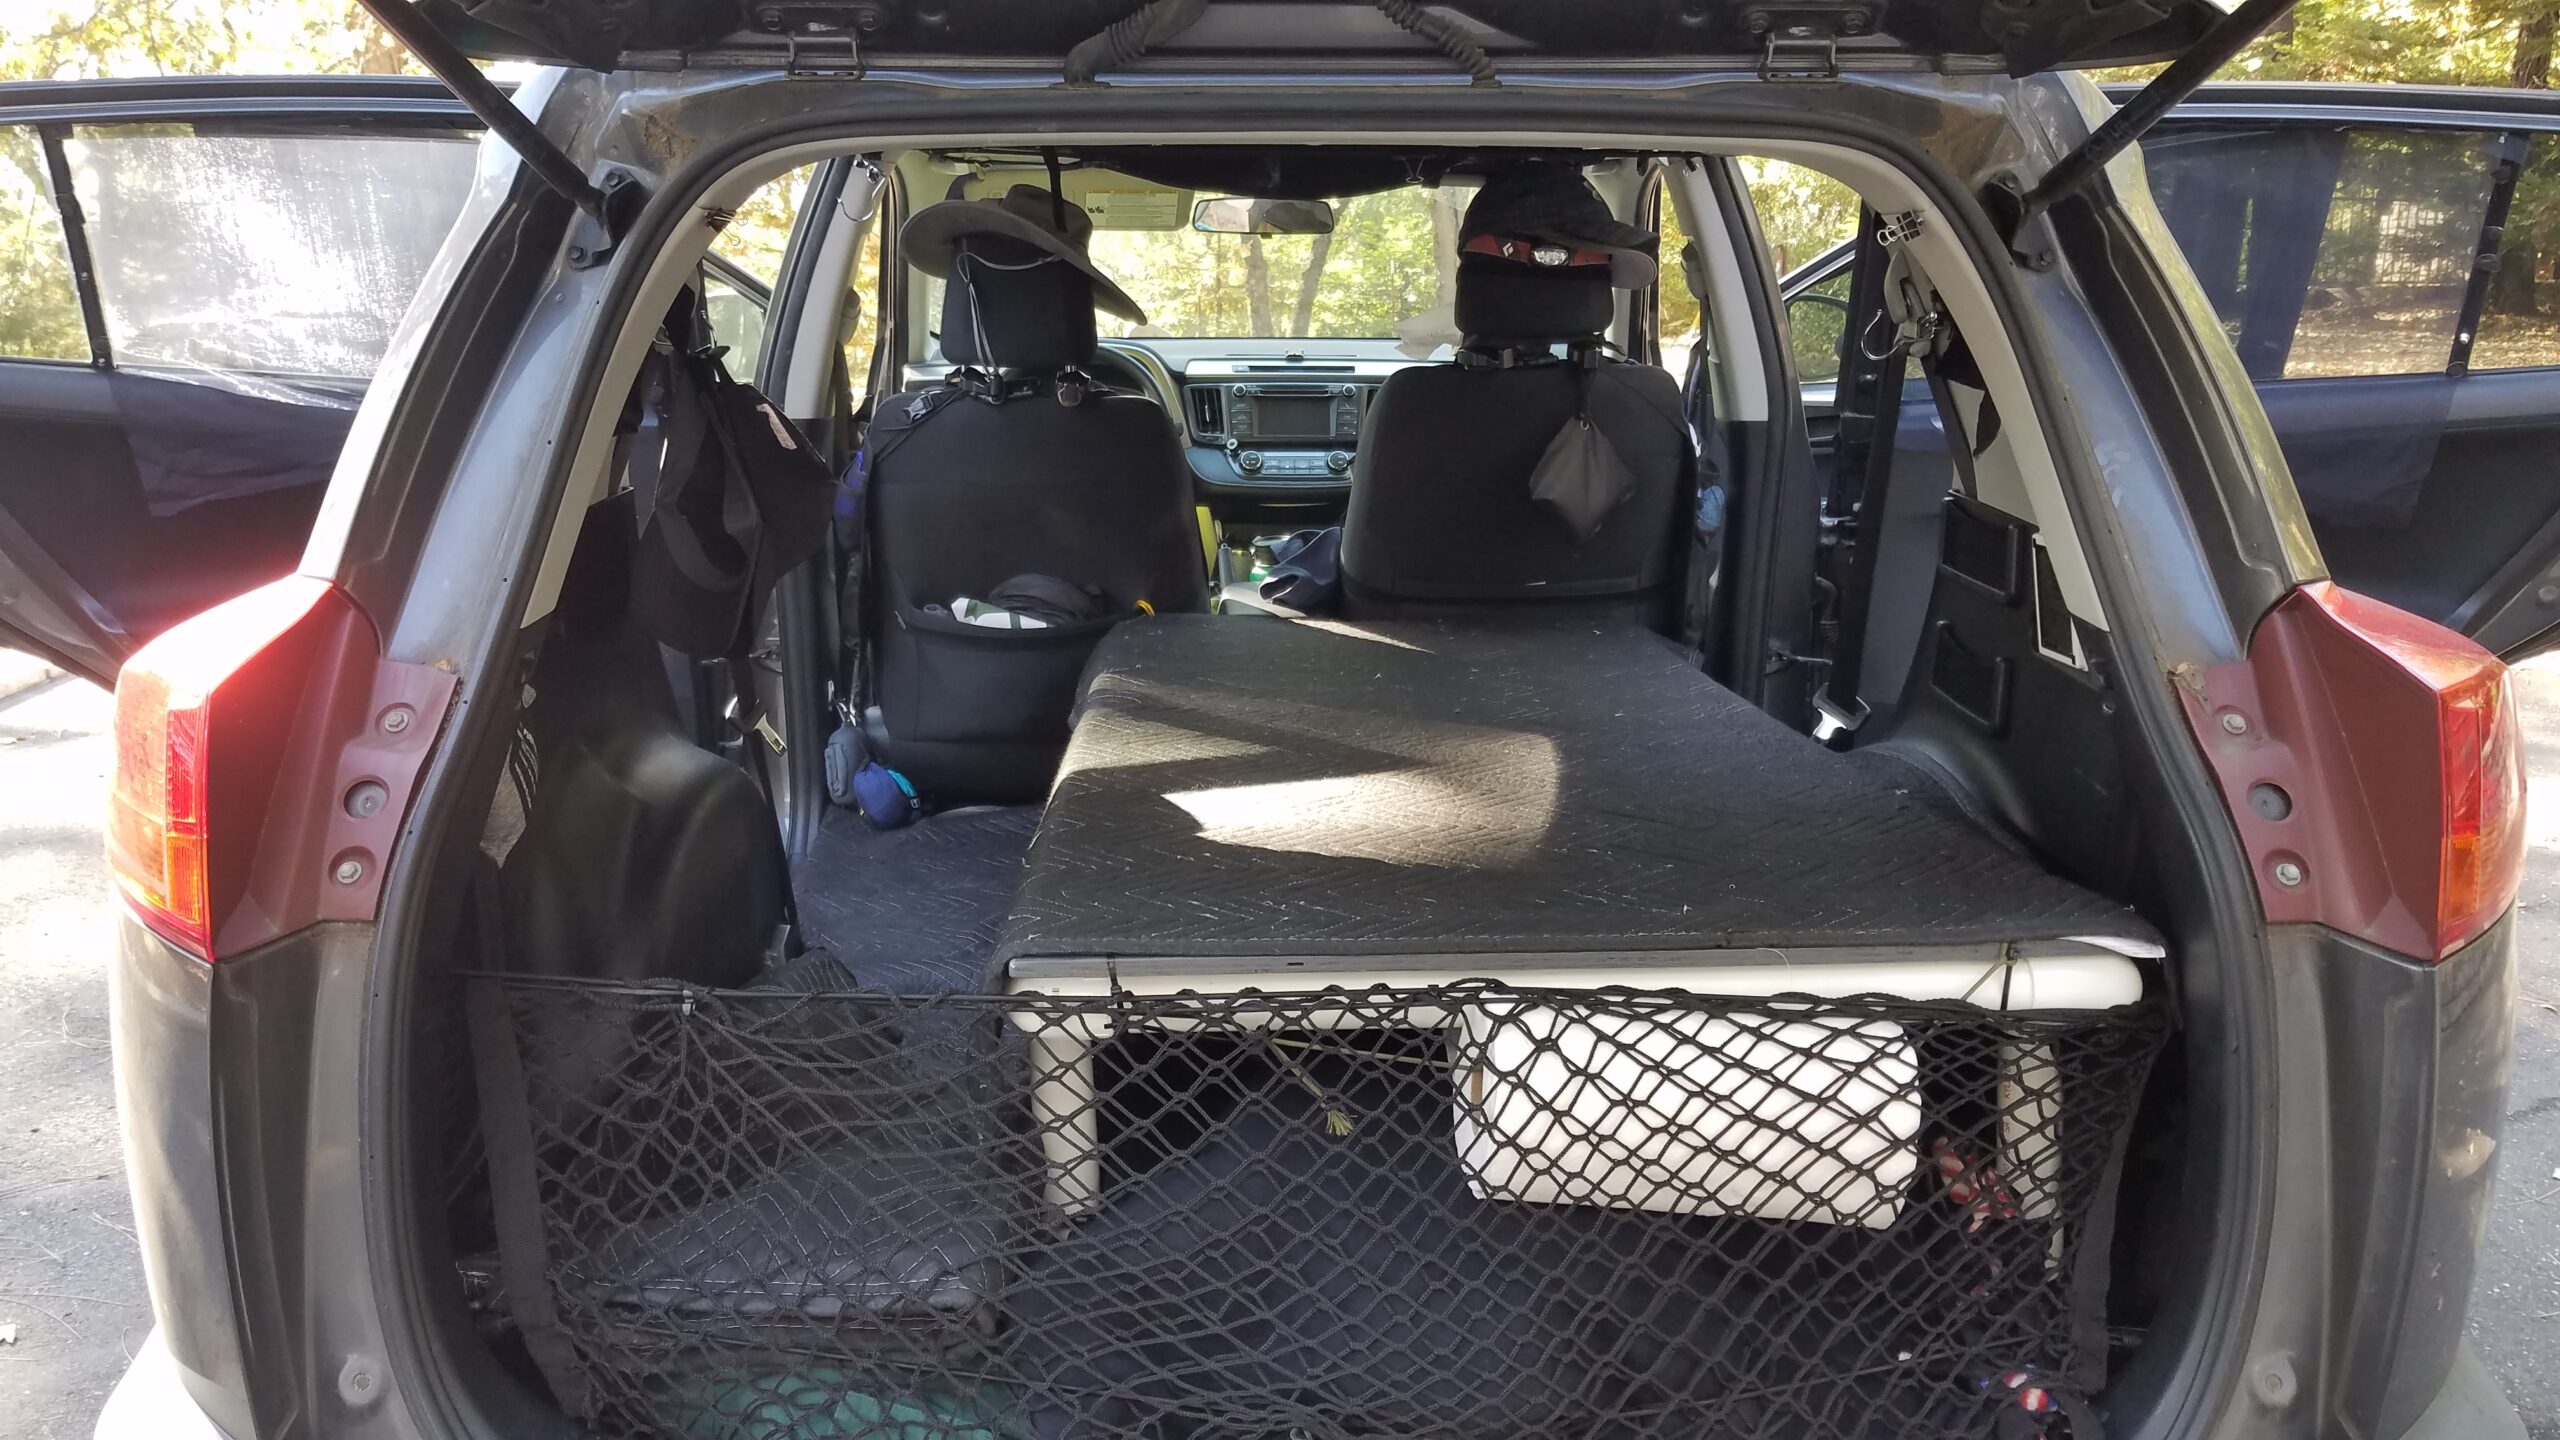
- The PVC platform that I made see the latest photo.
- Don’t forget, there is a platform 2.0 now!
- Curtains. I have done quite a few different curtains, and these curtains are the best I have found. I use them for the rear windows as they don’t totally fit the front (as they are larger and oddly shaped windows).
- On this same note, I got some Reflectix that has helped. The only thing I decided I didn’t like is that it’s difficult to roll your windows down when you need fresh air (aka, in the summer). But for colder nights, it’s nice to have. You can cut this roll to size (I used cardboard to get the dimensions I needed, then traced it on the Reflectix to get a good fit).
- After trying multiple window coverings, I have settled on Blackout Window Film, which is a blessing and really necessary if you ask me. Especially for those smaller triangle windows in the back. [photos to follow]
- Having a front window sunshade is a must. The one here has two pieces connected with some extra fabric that helps keep all the sun out, like by your rearview mirror.
- This is a must, some sleep mask for those days you want to sleep and the sun keeps you up.
POWER
- For power, I use my Jackery (click this like to see my review, it’s worth it). There is also a short video below.
- I also have a few Anker portable batteries that have been amazing! They take a while to charge but last an incredibly long time, and they are small enough to be put anywhere.
- Having extra long cords often help as well. I use a 6′ cigarette lighter extension that helps with this. I mainly used to power the Jackery while I’m driving.
- The best lighting I could find, The Luminoodle, has many cool features (magnetic, lantern mode, lots of light, and more).
Want more convincing on getting your own Jackery? Click the link to read my honest review.
FURNITURE AND COMFORT
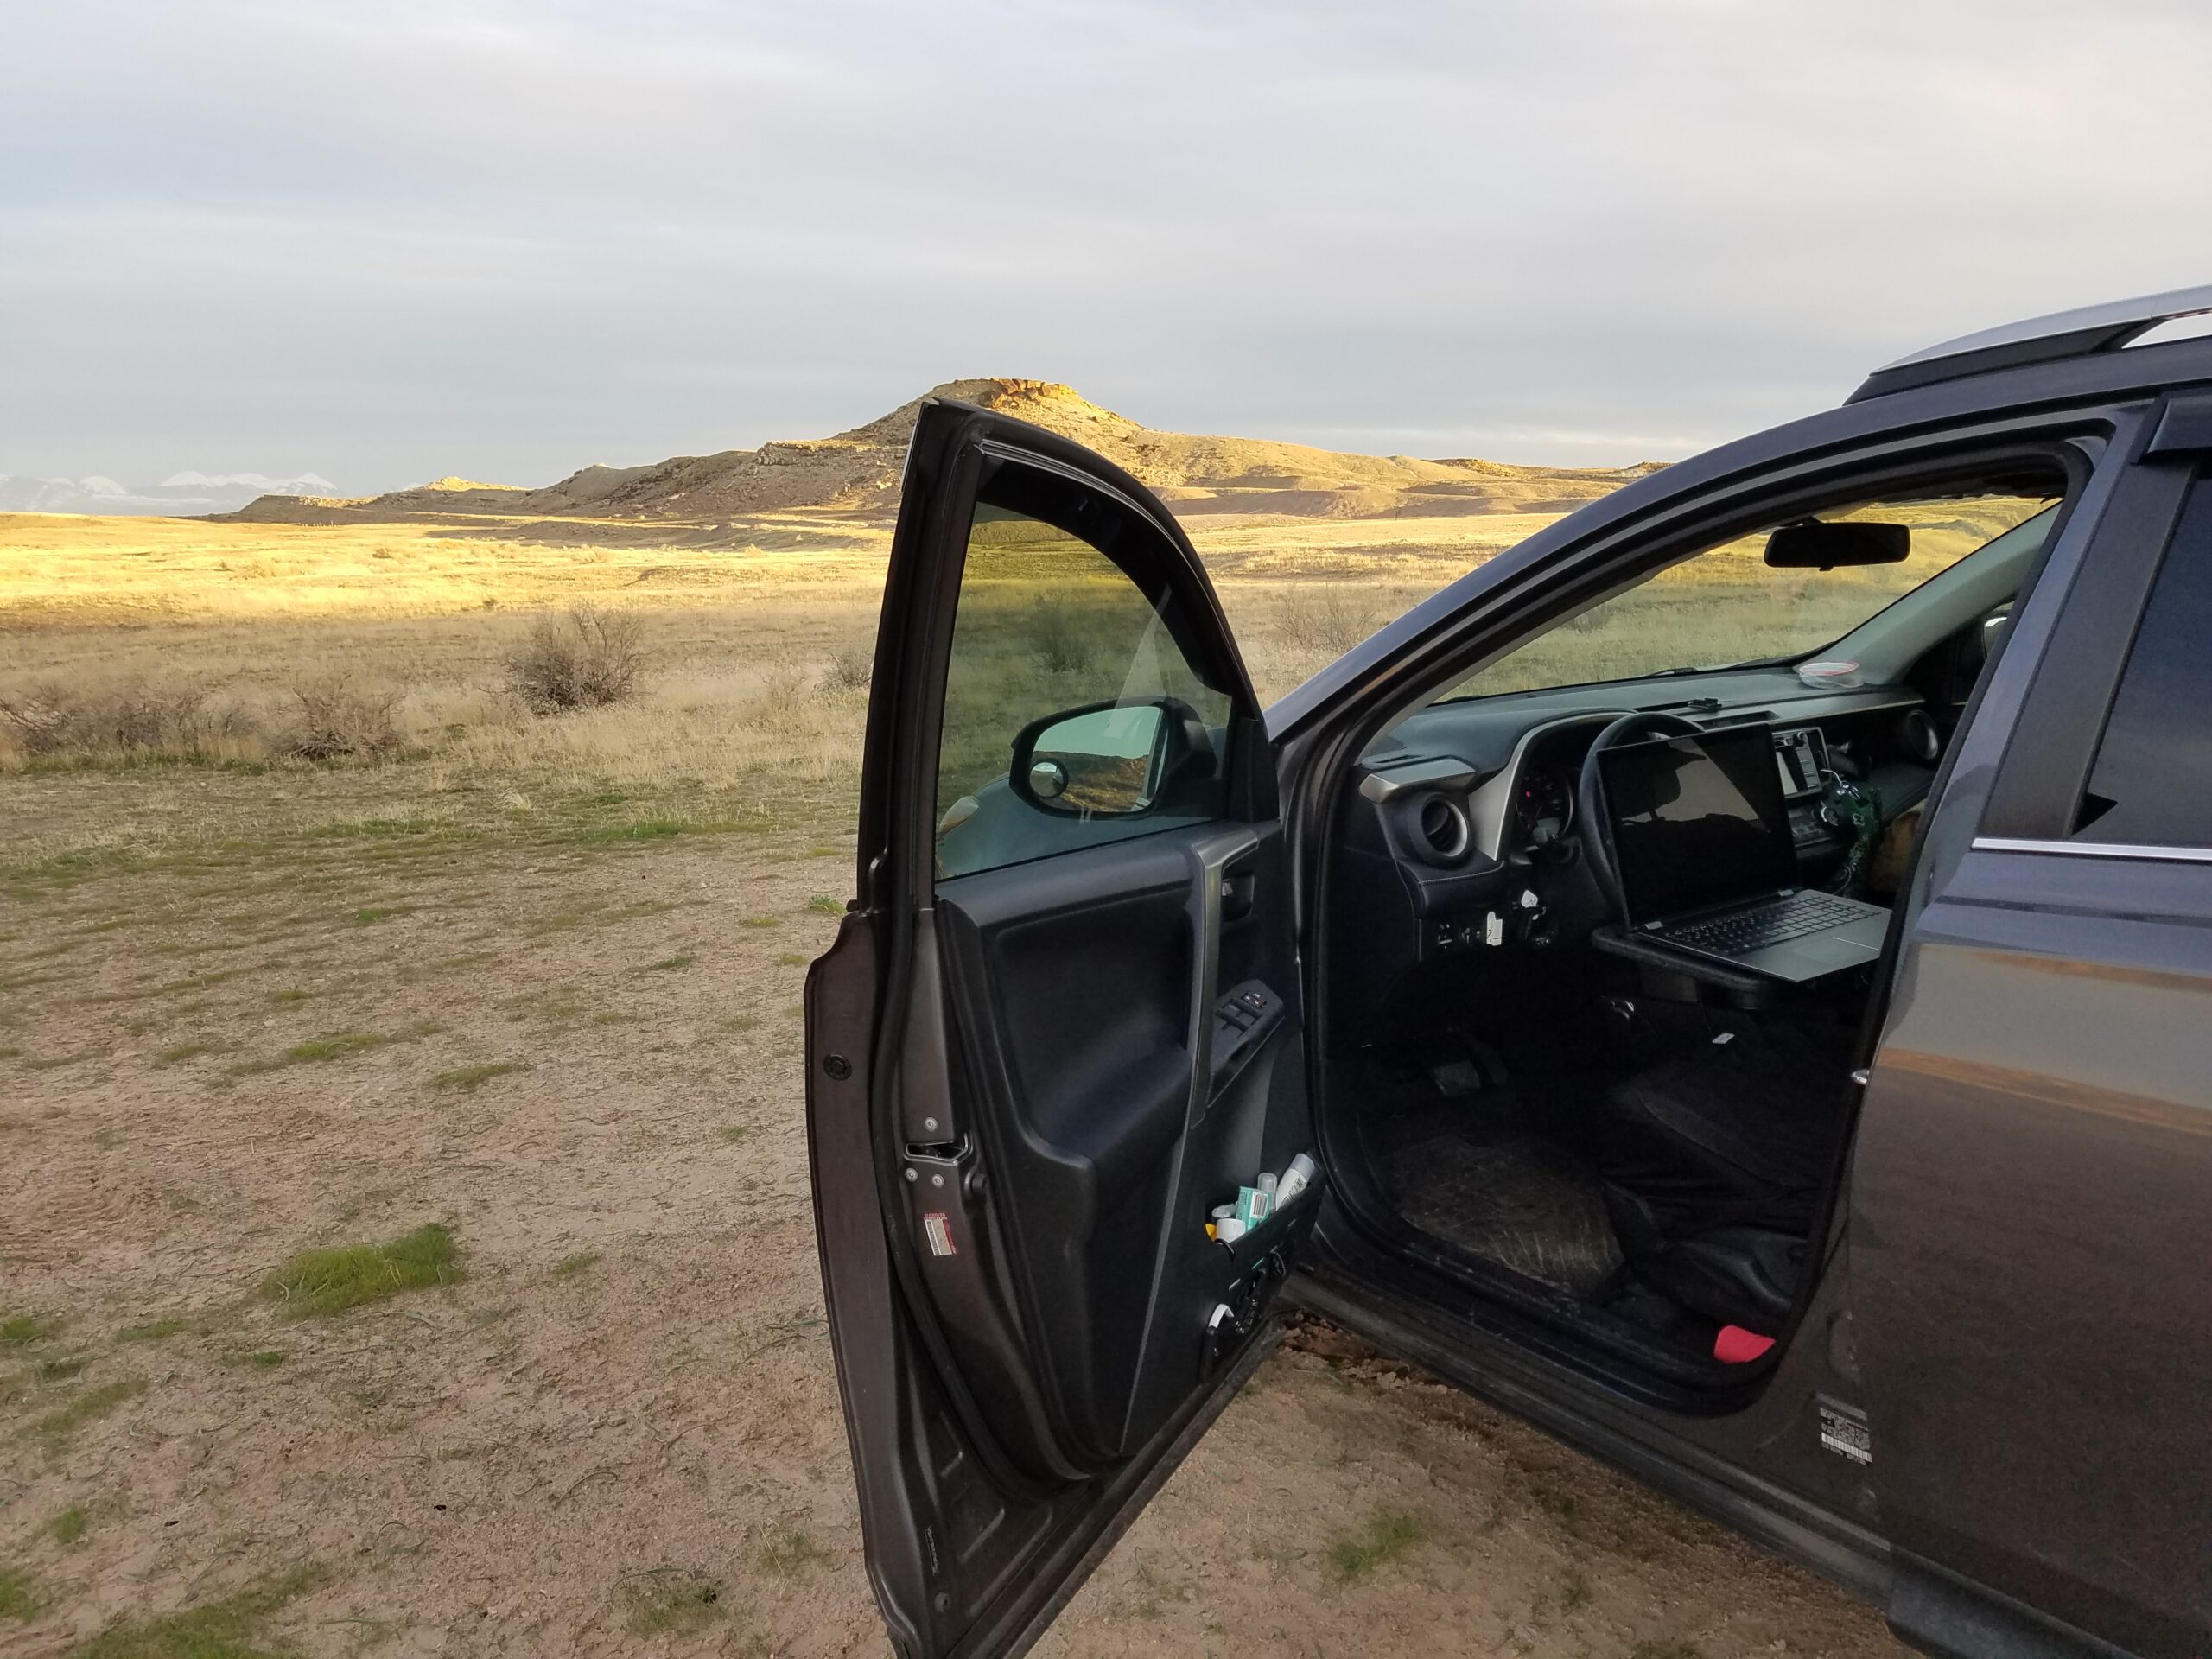
- Furniture, yeah, you read that right. I like to be comfortable and have a few options that I can use. I am not sure it's really furniture, but my steering wheel tray is AMAZING! I have been asked many times about it and highly recommend it.
- Seat covers that I actually really like. I have one for both driver and passenger seats.
- Then there are the comfortable things, like a hammock.
- ENO DL lounger is one of the best chairs I have ever used!
- Staying warm in the winter is important. I have a few different blankets. Recently I purchased a 12V blanket that I cannot wait to try out.
- It is extremely important to keep air circulating, especially when it's hot outside. I have a few USB-powered fans, but the one fan I recommend is this one. It has the ability to run on USB or just run it on its own power once charged. It has three different speeds and has an excellent clip.
More Suggestions & Things to Consider
If you live or camp in your car, there are a few things that you start to realize. One thing is odors.
The small space can get funky if you don't have dry bags (you can put your stinky laundry and even shoes in).
You also quickly notice how much space you wish you had.
As a chronic over-packer, yes, I am one of those people that plan for everything under the sun. You find clever ways of storing stuff, and having possessions that have multiple uses, and this process is always evolving.
My latest is using the Command Strips you can find at any store. They are convenient and work really well. Here are some other odds and ends I've been using.
- Clean air. There have been a few things that I have tried, but I have really liked using these charcoal bags. I keep one under each seat and have a few in the back areas (two hanging behind my seats). This has helped control the air quality inside my car. When living in the car for two weeks, not going to lie. It was getting a little ripe. I have found charcoal is a great way to remove odors.
- With that said, having a carbon monoxide detector is very important. Especially if you are going to cook inside your vehicle, something I don't recommend. It's smarter to cook outside or with the tailgate open.
- There have been two road trips I have taken that involved snow. I decided having a thermometer would be important (it's also nice to know the summer's temperature). I wanted one that was easy to read, had something I could put outside, and had a light for when I am sleeping and need to look around. That's when I found this indoor/outdoor thermometer.
- Window glare patch. This has helped a lot with the sun or reflections when parked. I have been using these for the last six months, and one is not sticking as well as it used to. When that happens, I just run it under water, dry it off, and it's good to go.
- Something not totally needed, but I decided to buy license plate security screws. These are similar to the lugnuts I have for my tires. I purchased them originally because where I lived, there were many thefts of license plates. This was the time CA decided to go away with dealer plates. I could go into it more, but this was cheaper than going to the DMV.
- No one needs the one thing I purchased that has truly changed everything. It's called the Stupid Car Tray. If you travel solo most of the time, this really has been an awesome thing to have.
STAYING CLEAN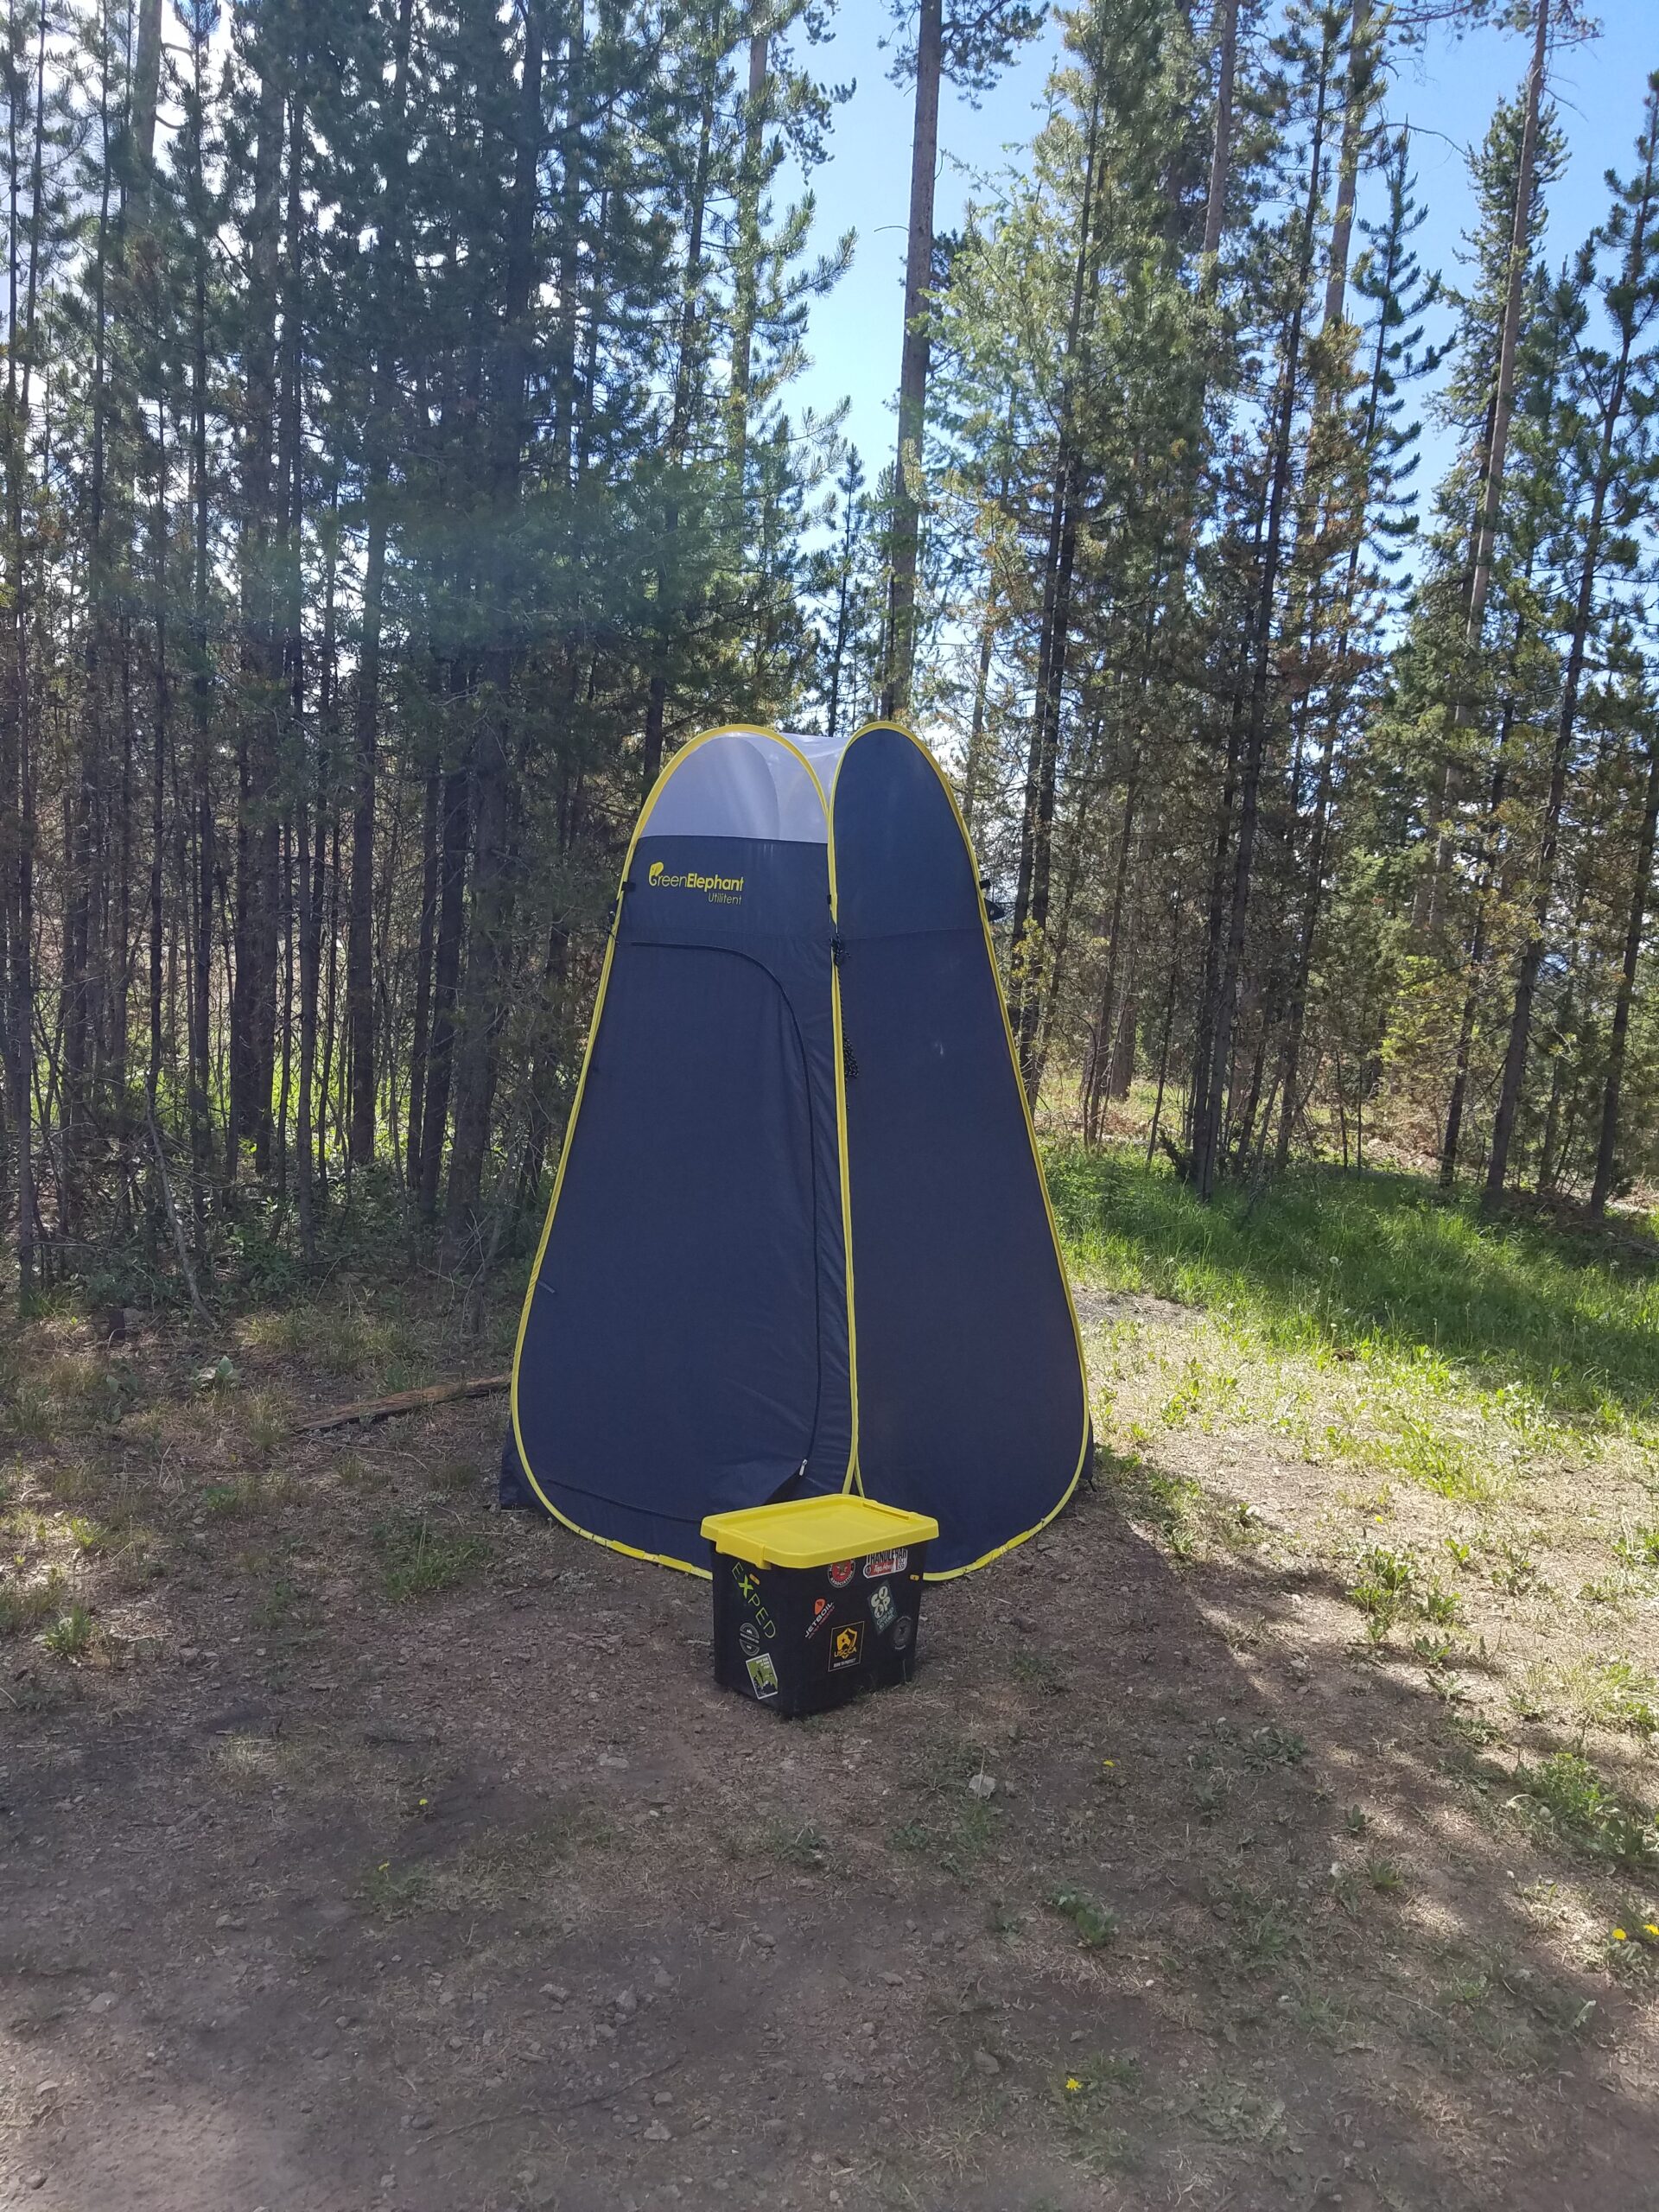
I don't think this necessarily goes with a Toyota Rav4 camper build, but it's one of the things I get asked A LOT.
So, I wanted to take a minute and share a few things that I do. As always, if you have further questions, or want more of an explanation, let me know in the comments below.
- Using facilities can be interesting. I recently found a small cheap chair (thanks to SUVRVing, if you didn't know a site I use All The Time!) and made a much more portable small toilet seat that has worked great! I pair this with bags and some other items to make it easier to manage.
- Check out my post for showering on the road (also check out my post on the best way I've found to stay clean while on the road).
- If you need a changing room, shower room, or bathroom. I suggest checking out the Green Elephant Privacy Tent (see photo).
- Most importantly, you have got to have water. Both to use for cleaning and to drink. For drinking, I use the Grayl water purifier.
What Do You Think of My Toyota Rav4 Camper?
WOW, this was a lot of stuff.
As you can see, I have quite a lot of gear. I also have been working on my latest conversion over the last few years.
As I've mentioned above, feel free to contact me or leave a comment below.
I'm always interested in seeing what other people have done. If you find anything useful, let me know that as well.
There is also a page that I started with some additional Rav4 photos. Check it out here. This is a work in progress, and I'm also starting a platform 2.0 build (click the link to see a preview)!
A lot of the stuff I use is from seeing what others have done, finding solutions for things I'm interested in, and getting advice from others living in their vehicles.
I look forward to hearing from you. Stay safe out there.
If you have any questions or want to know where I'm headed next, leave me a comment below.
If you have converted your own vehicle, I would love to hear about it.
And if you have pictures, share them! Send me an email.
Thank you so much! It was a lot of fun and still a work in progress.